Plug it in, then reach it from your PC
Three cables: power, then two network cables to your router. After that you never need a screen or keyboard on the server: your PC's browser reaches it through iDRAC, the server's built-in remote control.
-
Check it is server 3
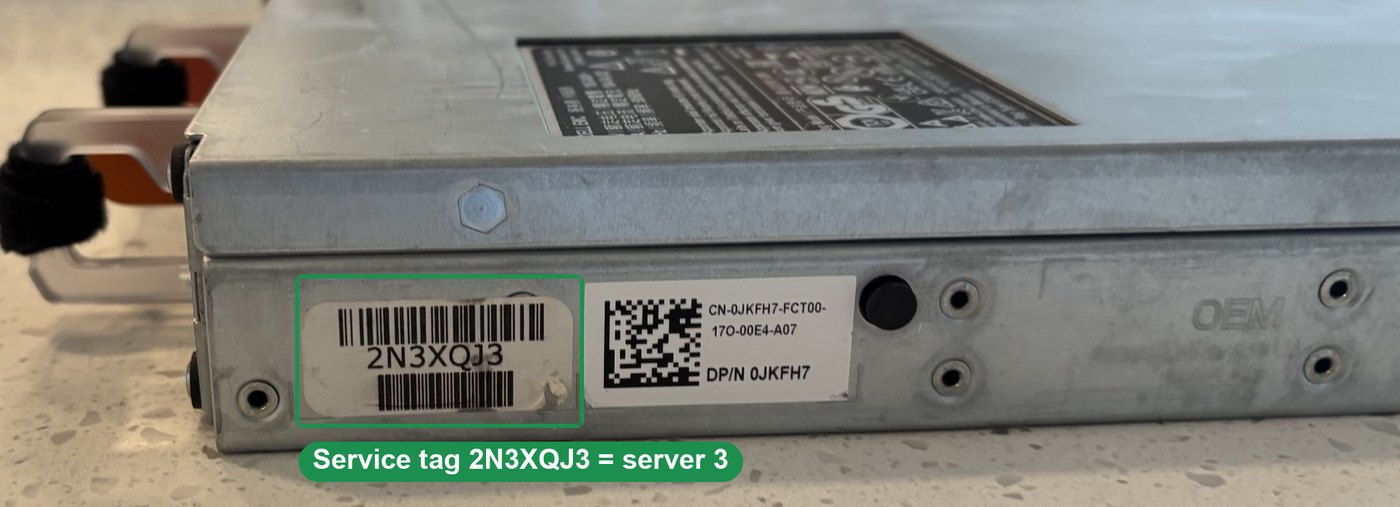
Only server 3. Server 2 has no fans, and server 1 has empty fan bays. If either is plugged in, unplug it.From the back: server 3 is the one with the open hole in the top-left slot. The other two have a cover or a fiber card there. The sticker on the side near the back reads 2N3XQJ3, and the lid has "Chad" written on it.
-
Power cord: done
Either power supply works; one is enough. A universal PC or monitor cord is the right type (C13 end into the server, normal three-prong plug into the wall), and it is fine for setting it up at home.
-
Two network cables to your router
Cable 2: from the port marked iDRAC, the lone network port at the far left, to your router. This one is the remote control.
Cable 3: from port 1, the first of the row of four (a small "1" is printed above it), to your router. This one gives Ubuntu internet during the install.
Use the router's numbered LAN ports, not the one marked Internet or WAN. Out of free ports? A small network switch adds more.
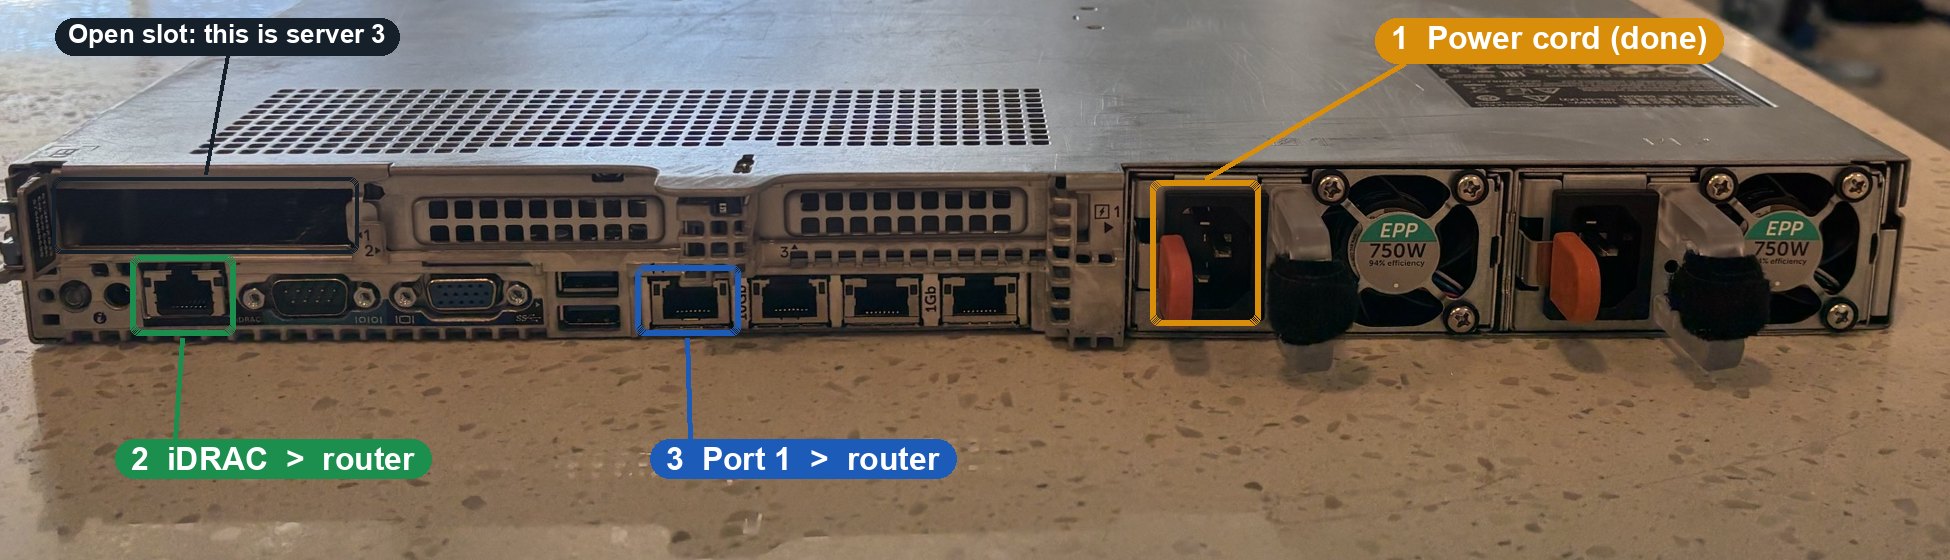
The little lights beside each port come on when the cable has a connection.
-
The iDRAC password: no tag on this server
This server has no pull-out password tag. Dell's front-panel list for the 8-drive R640 does not include one, and the lever at the far left is a latch with a screw behind it. The user name is
root. Two ways in:- Try
calvinfirst. It is Dell's password for servers ordered without the printed one, and what some resets go back to. - If that fails, set a new one at the server, once. It needs a screen (a VGA monitor, or a TV with a VGA-to-HDMI adapter) and a USB keyboard. Press the power button, press F2 while it starts, then iDRAC Settings, User Configuration, Change Password. Then Back, Finish, Yes. Dell says this works when the original password is lost. After that, everything runs from your PC.
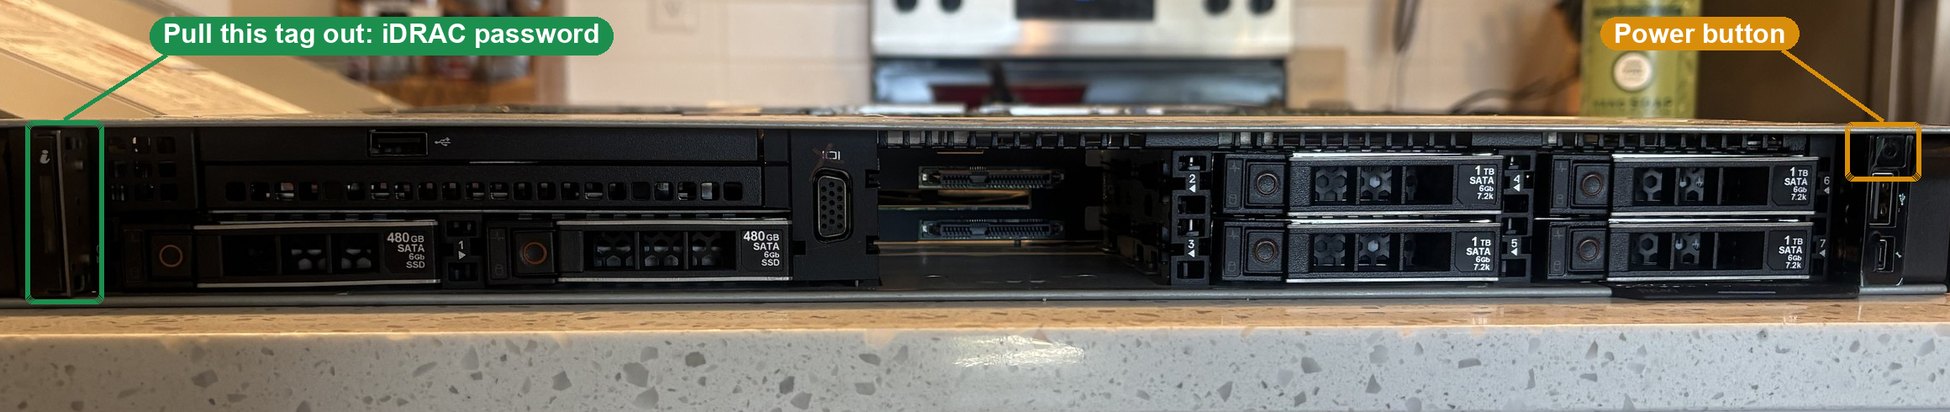 The "i" light is a button, not the tag. Dell's codes: blinking amber means the server has logged a fault; pressing it switches to blinking blue, an "identify me" signal for finding the server in a rack. Pressing it again switches back. It does no harm either way. The fault itself is listed in iDRAC's System Event Log once you are logged in.
Do not press the power button yet: iDRAC can switch the server on from your PC.
- Try
-
Open iDRAC in your browser
- iDRAC gets its address from your router automatically (Dell's default). Find it in your router's list of connected devices; the name usually starts with
idrac. - Type
https://plus that address into Chrome. A security warning comes up because iDRAC uses its own certificate: choose Advanced, then Proceed. - Log in with
rootandcalvin, or the password you set in step 4.
- iDRAC gets its address from your router automatically (Dell's default). Find it in your router's list of connected devices; the name usually starts with
Next, after you are logged in: open the Virtual Console, attach the Ubuntu 26.04.1 file from your PC as Virtual Media, and install from there.